Tomato Soup

I know, I’m terrible with keeping up on the posting. I still cook, I’m just too lazy to write most recipes down while cooking, then trying to take a decent picture, then typing it out… well, you get it.

I’m just going to start posting about food in general. This sounds more like fun and less like work, which is what this “blog posting” was starting to feel like!

Lately I’ve been into soups. Of the homemade variety of course. I was starting to get tired of the bland canned soups, though convenient, they were getting boring.

I’m more of a “creamy soup” person. Don’t get me wrong, I don’t mind a nice chicken noodle soup or, one of my favorites, Italian Wedding Soup, but there’s something about a ” cream-of-something” soup that says comfort food.

About a month ago, I made my very first homemade tomato soup. It was delicious! Way better than canned stuff and lots cheaper than getting it from The Loop ( a little better tasting than The Loop, if I do say so myself). The only gripe I had about it was having to cook everything, then transfer it in batches to the food processor, then strain it back into the original pan I started with. Not only did it make a mess and dirty up more dishes than I thought necessary, it took waaaaaay too long. I work 8 hours a day in a refrigerated cutting room, the last thing my weary bones want to do is stand in the kitchen for an hour and a half making soup!

So I decided I needed an immersion/hand blender. Good thing hubby paid attention to my griping! I came home a few days ago to an early Christmas present! Not only did he get me my hand blender; he got me the “Mac-Daddy” hand blender that resembles something a mechanic would have in his garage for working on exotic cars.photo 4

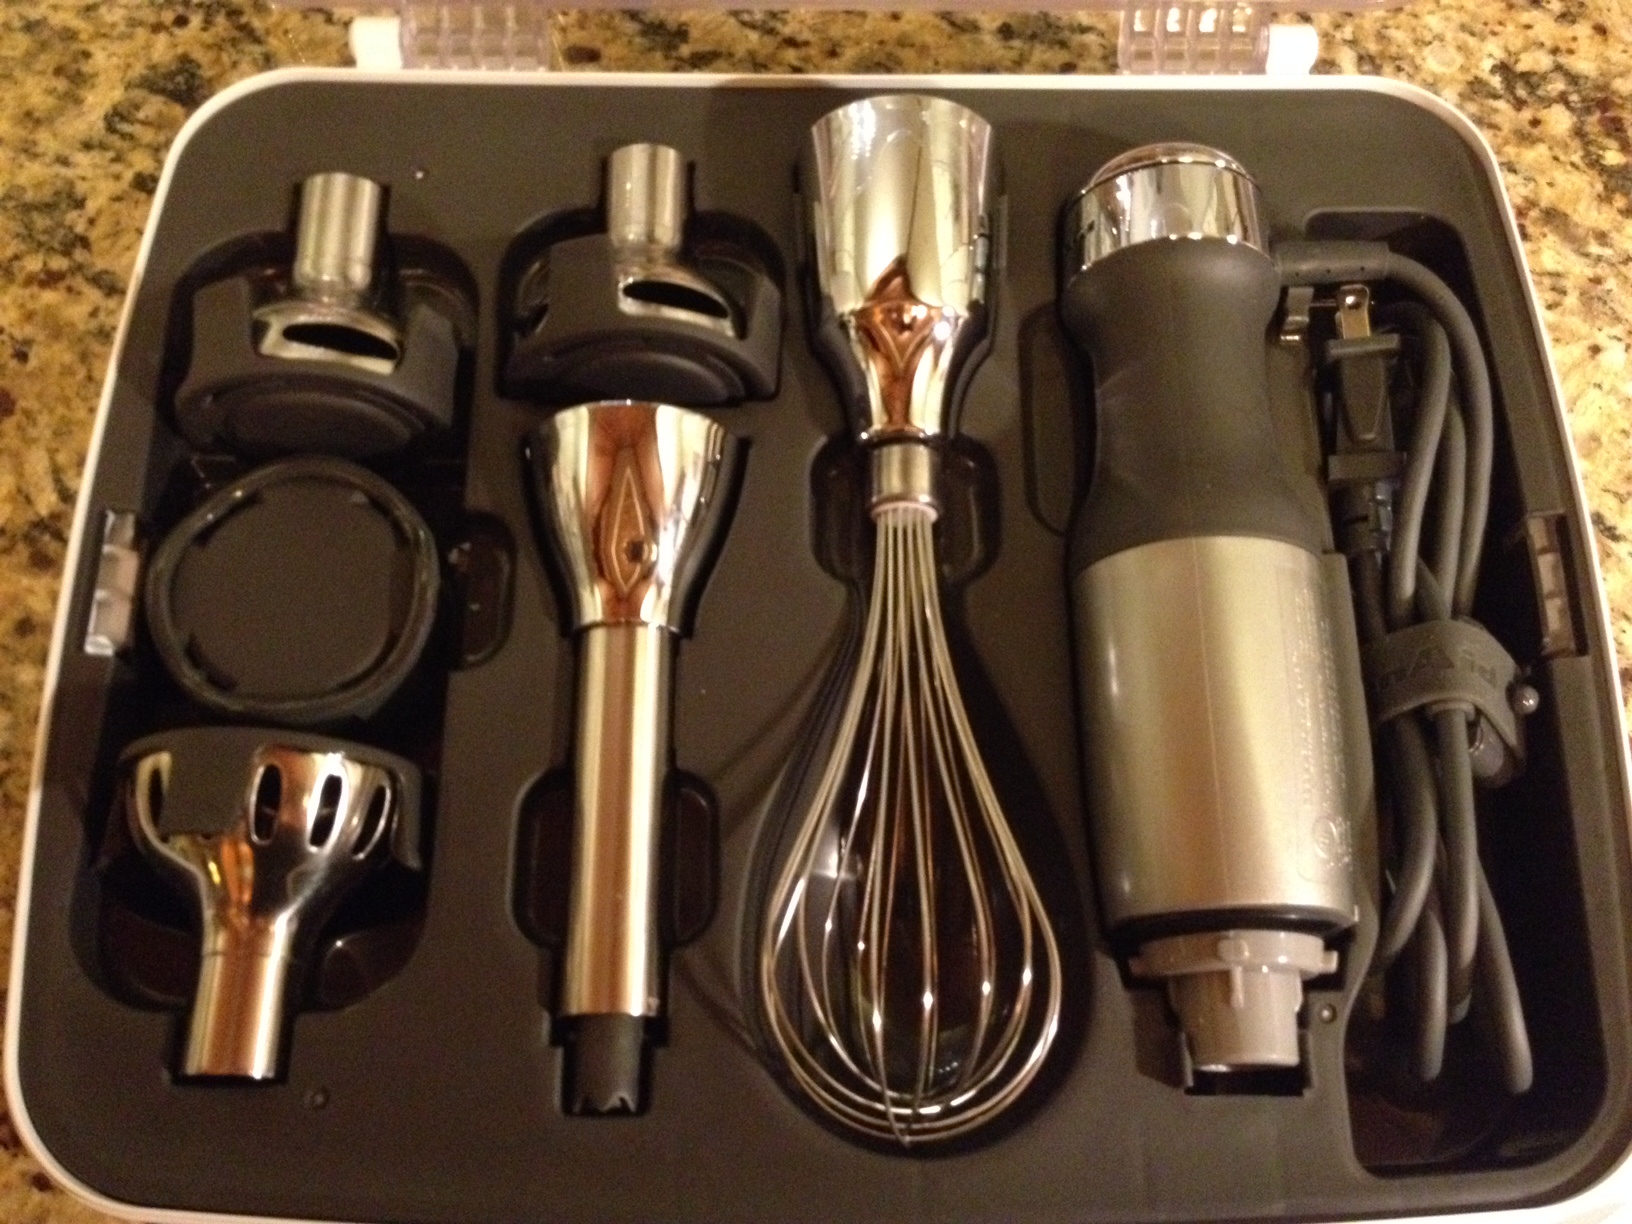
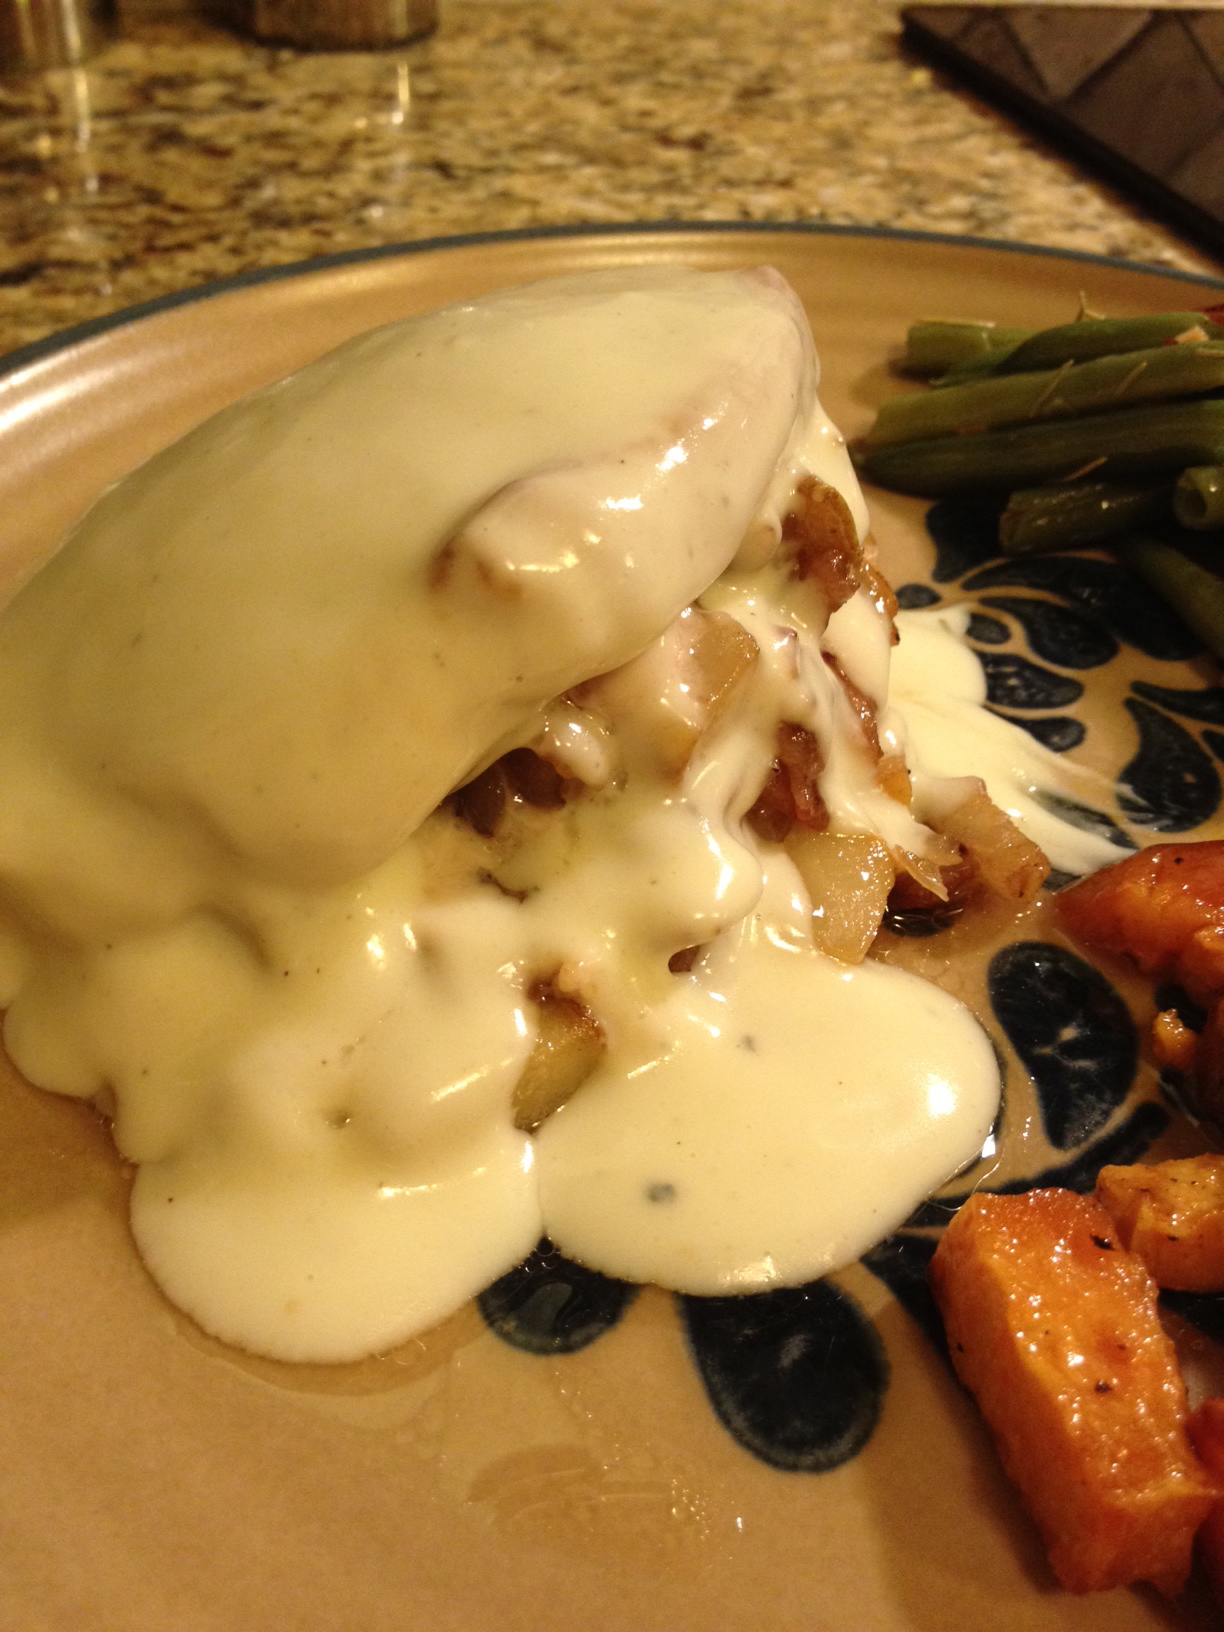
  Let me tell you, this thing is awesome! Last night I decided to make tomato soup again, albeit a little on the chunky side since I really didn’t think straining it was necessary (what’s a chunk or two of tomato in tomato soup, I mean, really!?)  I also made some cod croquettes to go with it, but they ended up being cod/tuna croquettes since I didn’t buy enough cod to feed everybody (through no fault of my own). They still turned out good, I just wish there would have been more!

I did manage to take a picture of my dinner last night…photo 5

For the soup, I used a recipe from Food Network that I tweaked a bit: cooked onions, carrots, celery, and garlic in olive oil till soft, added 5 tablespoons flour, then a 28 oz can of diced tomatoes and their juices, a 32 oz carton plus one cup of chicken stock, parsley, thyme and 2 bay leaves and let it simmer half an hour. Then took out the bay leaves and blended up all the veggies in the pot with my new toy, then added a cup of cream. So much easier this time around! Now I have to figure out what other kinds of soup to make!

Well off to play with some cheesecakes! I bought these mini springform pans months ago and haven’t used them yet so I’m thinking it’s time to break them in!

Austin Chicken

Took a month away from posting and during that time, went to Austin, Texas for the MotoGP at Circuit Of The Americas. Of course, it wouldn’t really be much of an adventure if we didn’t ride the ” Adventure” the whole way there and back!

We ate lots of good food while we were there and a few places in between, but this dish was inspired by one I had at the Iron Cactus in Austin. It’s a little time consuming in that it has many components, but each one is easy to make. Seasoned and grilled boneless, skinless chicken breasts, covered with peppers, onions, and a creamy, spicy cheese sauce, topped with fresh chorizo and guacamole.  We just ate it with chips and salsa, but Mexican rice and refried beans would go great with this dish!

photo 1

For the chicken breast marinade:

  • 3 boneless, skinless chicken breast halves
  • 1/2 cup olive oil
  • 2 tsp chili powder
  • 1/2 tsp cumin
  • 1/2 tsp cilantro
  • 1/4 tsp salt
  • 1 tsp chili garlic hot sauce

Place chicken breasts in a zip top bag. Combine remaining ingredients in a small mixing bowl and pour over chicken breasts. Toss to coat and refrigerate for at least two hours.

For the guacamole:

  • 3 ripe Hass avocados
  • 1 clove minced garlic
  • 1 tbsp minced onions
  • 1 tsp cilantro
  • 1/2 tsp salt
  • dash red pepper
  • juice of one lime
  • 1/4 tsp cumin (optional)

Remove skin and seeds from avocados. Place in a mixing bowl and mash with a fork until desired consistency is reached ( some like it chunkier than others!). Add remaining ingredients and mix well. Place guacamole in an airtight container. Press a piece of parchment or wax paper down on the top of the guacamole and seal tightly to keep it from turning to a brown yucky color. Refrigerate until ready to use.

Cream cheese sauce:

  • 4 oz. cream cheese
  • 1 seeded and chopped jalapeno, or 3 tbsp canned, diced jalapenos
  • 2 tbsp sour cream
  • 2 cloves minced garlic
  • 1/4 cup half and half

Combine all ingredients in a food processor and pulse until smooth. Refrigerate until ready to use.

To finish:

  • 1 green bell pepper, sliced
  • 1 medium onion, sliced
  • 1/2 pound fresh chorizo (not the dried, Spanish kind!)
  • 1 tbsp olive oil
  • Marinaded chicken breasts
  • Prepared guacamole
  • Prepared cream cheese sauce
  • 1 cup shredded cheddar or Mexican blend

Preheat a grill over medium heat and preheat your oven to 425 degrees.

Grill chicken breast for about 8 to 10 minutes per side, until slightly under done, about 150 to 155 degrees. Meanwhile, in a skillet over medium heat, brown and crumble chorizo. When cooked through, remove from heat. Wipe skillet and add olive oil. When hot, add peppers and onions to skillet and cook and stir until soft; season with salt and pepper.

Place chicken in a baking dish and top evenly with peppers and onions, cheese sauce, and shredded cheese. Bake for 10 to 12 minutes or until chicken is done and cheese has melted and slightly browned. Top with chorizo and guacamole to serve. Savor the flavor!

Pear And Bacon Stuffed Pork Chops With Gorgonzola Sauce

It’s a New Years resolution of mine to learn more pork recipes. As you can see, I only have a couple so far. I’ve been terrified of cooking pork loin chops just because they’re so easy to dry out, and I’m not a huge fan of eating shoe leather.

I’m not too familiar with cooking pork chops, but I know a lot of pork recipes use apples, and I thought about a pear and gorgonzola salad, and tried to figure out how to combine the two. This is what I came up with!

Sorry about not being able to see much of the pork chop in the photo! The sauce was so good, I got a little carried away!photo 3

For the pork chops:

  • 4  boneless pork chops, butterflied
  • 3  tbsp butter
  • 3  slices bacon, diced
  • 2  bartlett pears, diced
  • 1  small onion, diced
  • 1  tsp balsamic vinegar
  • 1  tbsp brown sugar

Preheat oven to 350 degrees.

Melt butter in a large skillet over medium high heat. Sear pork chops for 3 minutes on both sides, still folded over like they’re not split for stuffing. Set aside and keep warm until ready to stuff.

In the same skillet, cook bacon until browned on the edges, but still slightly raw in the center. Add pears and onions to skillet, and cook until softened. Season with salt and pepper. Stir in balsamic and brown sugar. When sugar is well blended into mixture, remove from heat and cool slightly. Spoon 1/4 of mixture into each chop and place in a greased baking dish.

Bake in the oven for 30 minutes.

For the gorgonzola sauce:

  • 3  tbsp butter
  • 3  tbsp flour*
  • 1 1/2 cups milk
  • 4  oz. crumbled gorgonzola

In a sauce pan, melt butter over medium low heat. Whisk in flour and let cook, stirring continuously for one minute, then whisk in milk. Continue to cook and stir until sauce is thickened. Remove from heat and stir in gorgonzola a little at a time until well incorporated. Season with salt and pepper to taste.

To serve, place a stuffed pork chop on a plate and top with heaping spoonfuls of gorgonzola sauce. Goes well with green beans and oven roasted sweet potatoes.


* I used Bob’s Red Mill Gluten Free All Purpose Baking Flour

Fried Fajitas

It’s the New Year and everyone is making the resolution to eat healthy and lose weight, and I’m posting a recipe that is chicken, onions, and peppers, wrapped in a flour tortilla and deep-fried, then smothered in cheese sauce and topped with more cheese! (Sorry if you’re dieting!) 🙂 I’ve made a baked version of this too, and it’s just as tasty,but not as crispy!

For the fajitas:

  • 2 lbs boneless, skinless chicken breasts, cut into strips
  •  2 tbsp olive oil
  • 1 green pepper, sliced
  • 1/2 lg onion, sliced
  • 1 1/2 tbsp Fajita seasoning
  • 12 flour tortillas
  • 1 qt vegetable oil
  • 1 cup shredded Mexican cheese blend
For the cheese sauce:
  • 4 oz cream cheese, softened
  • 1 jalapeno, seeded
  • 2 tbsp sour cream
  • 1/4 cup half and half
  • 2 cloves garlic

Prepare the cheese sauce first. In a food processor, chop jalapeno and garlic. Add cream cheese, sour cream, and half and half. Pulse until smooth and well blended. Place in the refrigerator while preparing fajitas.

To make strips with the chicken breasts, place the chicken breast on a cutting board. Place your palm flat on the chicken breast, and starting at the thick end, cut breast into two pieces by running a knife horizontally the whole length of the chicken breasts. You should have 2 cutlets.

Cut the cutlets into strips as shown. Repeat with remaining chicken breasts.

( This is a great way to make your own chicken breasts cutlets for other recipes, and it’s cheaper than buying them already cut! You pay more per pound for the extra processing!)

Heat olive oil in a large skillet over medium heat. Add onions and peppers and cook until soft, about 5 minutes. Add chicken and cook and stir about 10 minutes. Add fajita seasoning and cook about 3 more minutes. Remove from heat, and set aside.

Heat vegetable oil in a large stock pot over medium high heat while preparing fajitas.

To assemble, spoon about 3 heaping tablespoons of fajita meat and veggies on to a flour tortilla and roll up as shown. Secure with toothpicks. Repeat with remaining tortillas.

Fry rolled up tortillas, 2 at a time, until tortillas are golden, and remove to a paper towel lined plate. Preheat oven to 350 degrees. Once cool enough to handle, remove toothpicks from the fajitas, and line up in a greased 13×9 baking dish.

Spoon cheese sauce evenly over the fajitas, then sprinkle with shredded cheese. Bake, uncovered about 15 minutes, until cheese melts and starts to brown. Serve with black beans, and fresh pico de gallo.  Enjoy!

Chicken Parmesan Pasta Pie

Years ago, we had a restaurant in town called “The American Cafe”. They had these pasta dishes called “Pasta Pies” and of the three they sold, this was my second favorite! (My first being the Smoked Chicken.) Since it’s been way too long since my last Pasta Pie fix, I decided to create my own! It’s an easy recipe, but has several steps that make you feel like it takes a while, but you’ll find the end result well worth it!


For the sauce:

  • 1 medium onion, chopped
  • 1 green bell pepper, chopped
  • 2 cloves minced garlic
  • 1 tsp salt
  • 2 tbsp olive oil
  • 1 28 oz can diced tomatoes
  • 1 15 oz can tomato sauce
  • 1 6 oz can tomato paste
  • 2 tbsp parsley
  • 1 tbsp basil
  • 2 tbsp oregano
  • 1 tsp sugar
  • 6 oz water

For the chicken:

  • 1 1/2 lbs chicken breast cutlets
  • 2 eggs, beaten
  • 1 tsp water
  • 2 cups seasoned breadcrumbs
  • 1 cup flour
  • vegetable oil for frying
  • 12 oz Penne pasta
  • 2 cups mozzarella cheese

Prepare the sauce first. In a stock pot, heat 2 tbsp olive oil over medium heat. Add onion, pepper, garlic, and 1/2 tsp salt. Let cook 10 minutes until onions are soft. mix in diced tomatoes, tomato sauce, tomato paste, water, seasonings, and remaining 1/2 tsp salt. Bring to a slight bubble. Reduce heat, cover and simmer while preparing the chicken.

In a large skillet, pour vegetable oil to a height of 1 inch, and heat on medium high. Set up a frying station; breadcrumbs in one bowl, beaten eggs and 1 tsp water in another, and flour in a large zip lock bag. 

Place chicken cutlets in the bag with the flour and shake well to coat the chicken. Take cutlets, one at a time, and dip in egg mixture, coating well, then dredge in breadcrumbs. Fry cutlets two at a time until golden brown and center is firm, about 3 or 4 minutes per side. Set aside on a paper towel lined plate to cool for 5 minutes.

Preheat oven to 350 degrees.
While chicken is cooling, cook pasta according to package directions, drain. Stir pasta into sauce. Cut cooked chicken into bite size pieces and stir into pasta. Pour pasta into a greased 13×9 inch casserole pan. Sprinkle mozzarella on top and bake, uncovered for 20 minutes, until cheese is melted on top. Serve with a salad! 

“Man Approved” Quiche

Real men do eat quiche! Especially when it’s loaded with bacon, onions, mushrooms, asparagus, and cheese! Since it was the day before Thanksgiving, I wanted to cook something light, and not spend too long in the kitchen since I would be cooking for hours the next day. This recipe uses refrigerated pie crust, so it’s very easy to prepare. Just serve with a pre-washed salad blend from the store, and you’ve got tasty meal!

  • 1 medium red onion, thinly sliced
  • 3/4 cup asparagus, cut into 1 inch pieces, rough ends removed
  • 4 oz mushrooms, sliced
  • 5 slices cooked bacon, crumbled
  • 2 tbsp olive oil
  • 1 tsp salt
  • pepper
  • 1 9 inch refrigerated pie crust
  • 3 eggs
  • 1 cup half & half
  • 1 1/2 cup shredded swiss cheese
  • dash nutmeg (optional)

Preheat oven to 350 degrees.

Heat olive oil in a large skillet over medium heat. Add onions and salt and cook, stirring occasionally, until onions are nicely browned, about 20 minutes.

While onions cook, unroll pie crust into a greased 9 inch pie plate or flan dish. Pierce dough with a fork in several places in the bottom and sides to keep crust from bubbling up while baking. Place in oven and bake 10 minutes.

Stir in asparagus and mushrooms with onions, and cook until asparagus is slightly softened, then stir in bacon, and simmer 5 minutes. In a medium mixing bowl, whisk eggs until well beaten, then whisk in half & half. Add a sprinkle of salt, about 2 turns of a pepper grinder, and nutmeg (if desired).

Sprinkle half of the cheese on top of the baked crust, then spoon veggies evenly on top, the sprinkle with remaining cheese. Pour egg mixture evenly over cheese and veggies. Bake for 30 minutes, until browned, and center is set. Let stand 10 minutes before slicing. Enjoy! (We sure did! :))

French Onion Soup With Stuffed French Loaf

A few years ago, I was lucky enough to travel to Paris with my “adoptive” sisters. It was October, it was cold, and rained two out of 3 days we were there. On a trip to Versailles, we stopped at a little cafe just outside of the palace gates, and Lori ordered classic French Onion Soup, (though I think the menu said “onion soup”) but now, anytime it’s cold and rainy, I crave this soul-warming treat!

Whenever I serve a homemade soup as a main course, I usually serve this stuffed French Loaf along side, as it’s quick and makes the perfect size sandwich for dipping! I used ham and Swiss cheese this time, but depending on the soup, I’ll change the meat and cheese to better pair with the soup.

For Soup:

  • 2 large white onions, sliced
  • 1 large red onion, sliced
  • 1/4 cup butter
  • 1 tsp salt
  • 32 oz container beef broth
  • 15 oz can chicken broth
  • 2 cloves minced garlic
  • 1/2 cup red wine (I used a Cab from Sonoma)
  • 1 tbsp balsamic vinegar
  • 1 tbsp soy sauce
  • 1 tbsp fresh parsley
  • 2 tbsp fresh thyme
  • 4 slices French bread, cut 1/2 inch thick, and toasted
  • 4 slices Swiss cheese
  • 4 slices mozzarella cheese

In a large stockpot, melt the butter over medium heat. Add onions and salt, and cook, stirring occasionally, for 30 minutes until onions are carmelized.

Add broths, garlic, red wine, vinegar, soy sauce, parsley, and thyme. Reduce heat to low and let simmer 30 minutes more.

Ladel soup evenly between 4 oven proof bowls. Top each with a slice of toast, and a slice each of mozzarella, then Swiss. Place bowls on a baking sheet and place under broiler until cheese has melted, and is browned on top. Serve with slices of stuffed French loaf.

For Stuffed French Loaf:

  • 1 can refrigerated French loaf
  • 1/4 lb thin sliced ham
  • 1 cup shredded Swiss cheese
  • 2 tbsp Dijon mustard
  • 2 green onions, chopped ( optional)

Preheat oven to 350 degrees.

Unwrap French loaf from packaging, and place on a sheet of parchment paper. Find the seam and gently unroll loaf until it’s flat. Spread mustard on dough, leaving 1/4 inch on all sides. Place sliced ham in a single layer, and evenly sprinkle cheese on top of ham. Sprinkle with onions , if desired. Gently roll up loaf, place on greased baking sheet. Pinch ends together to keep cheese in, and cut 5 small slits in the top of loaf. Bake for 28 to 30 minutes, until golden brown. Let loaf sit for 5 minutes before slicing into 1 inch sandwiches. Enjoy!

Santa Fe Swine Chili

Chili has to be one of my favorite dishes, period. I could eat it once a week, even in the hottest months of summer, so I just had to come up with another chili recipe to add to my repertoire, and why not make it with pork tenderloin? I like to top my chili with shredded cheddar, sour cream, and Fritos, though my hubby prefers tortilla chips. Load it up, or eat it straight out of the pot, it’s delicious!

  • 2 lbs pork tenderloin, cut into bite size pieces
  • 1 large onion, chopped
  • 1 green bell pepper, chopped
  • 1 red bell pepper, chopped
  • 3 cloves minced garlic
  • 6 slices cooked bacon, chopped
  • 1 28 oz can diced tomatoes
  • 1 15 oz can tomato sauce
  • 1 15 oz can beef broth
  • 1 15 oz can kidney beans
  • 1 15 oz can black beans
  • 1  4 oz can chopped green chiles
  • 3 tbsp chili powder
  • 1 tbsp cumin
  • 1 tbsp oregano
  • 3 tsp smoked paprika
  • 1 tsp cayenne

Place all ingredients in a slow cooker and cook on low for at least 8 hours. Serve with your favorite chili toppings!

*Note, this is a great workday meal! Just chop veggies and tenderloin the night before and place in baggies in the fridge. It will save time on your way to work and you’ll come home to an easy, no fuss dinner! 🙂